The first thing that comes to mind when looking to expand the range of a wireless router is using a range extender. Now, a traditional network setup does include a range extender, no doubt, however, times have changed. The inception of the Mesh WiFi technology has taken the networking field by storm. And systems like the ‘Linksys MX10 Velop AX Mesh WiFi 6 system’ are helping users obtain seamless internet coverage at even the remotest corners of their homes. If you have recently switched to the Linksys MX10 Mesh WiFi system, and need help with the setup part, this blog is what will walk you through the same. You’ll find details on how to access the login page, configure the network settings, and add additional nodes to the setup. But first, a bit about the Mesh technology!
What is a Mesh WiFi system?
Mesh, as the name suggests, is a group of several router devices which communicate with each other to provide all-around signal coverage. Imagine having a common/host router and a second router connected to it, acting as a signal recipient and transmitter to expand network coverage.
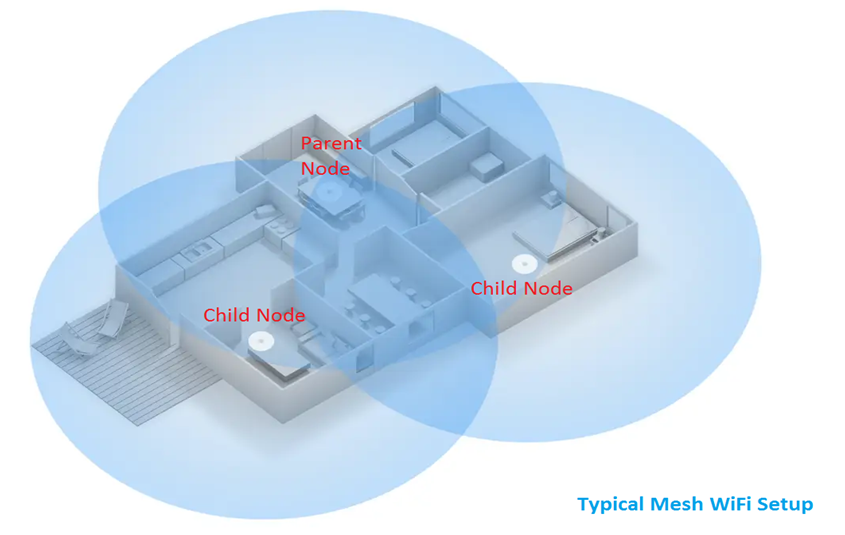
The host router in this kind of setup is recognized as a ‘Parent Node,’ while the secondary routers are termed as ‘Child Nodes.’ Similarly, when you set up your Linksys MX10 Mesh WiFi system, you’ll need to assign one of the routers as a Parent router, and the others as its Child Nodes.
Things you need for Linksys MX10 setup
Linksys Smartphone App: Setting up your Linksys MX10 Velop AX Mesh WiFi 6 system is easier using the Linksys smartphone app. You can install it on your smartphone(iOS/Android) and follow the on-screen instructions to configure the settings easily.
Working internet connection: Make sure the internet connection is up and running from the ISP(Internet Service Provider) end.
Configuring Linksys MX10 Velop AX Mesh WiFi 6 system settings
Once you have the Linksys app installed on your smartphone, here are some steps you can follow:
- Connect one of the mesh routers to the MODEM using an ethernet cable. Also, connect them to the power outlet and turn on the power supply. Wait for the light on the node to turn solid purple.
- Once the light on the node turns solid purple, launch the Linksys smartphone app and tap on “Set up a new WiFi network.”
- Enable the device bluetooth if the app prompts you to do so.
- Agree to the Terms and Conditions on the next page.
- The next page will display a list of the router devices on the screen. Select the one that belongs to the device you are setting up.
- Plug in your parent node and then tap ‘It’s Plugged in.’
- Position the node as per your requirements and tap on the ‘Next’ button. Now, tap on the ‘It’s in the open’ button.
- Follow the on-screen instructions and then tap on the ‘It’s Connected’ button.
- If the light begins to flash purple, click on the ‘Yes, it’s blinking purple’ button. If not, click on the ‘No, it’s not blinking purple’ button.
Adding parent node to Linksys account
- The app will now check for an internet connection. If detected, you’ll be redirected to the Linksys account setup page. Create a Linksys account by filing in the required information and then login using the same.
- The parent node will now link to your Linksys account.
- On the next page, personalize your WiFi network. Edit the wifi name and the password and click on the ‘Next’ button. The setup will configure the network.
- Now, select the location where you wish to keep your node at and click on the Next button.
- You have set up your parent node. Tap on the Next button now.
Adding Child Node
- Click on the ‘Add a node’ button on the page.
- On the next page, tap on ‘To extend my wifi using a new child node.’
- Read through the instructions being displayed on how to place the child node and tap on the ‘Next’ button.
- Ensure the child node is powered on and is discoverable and tap on the ‘Next’ button.
- The app will now detect the child node and ask you to specify the status when the LED on it blinks purple. Once it does, tap on the ‘Yes, it’s blinking purple’ button.
- Network settings from the parent node will now be applied to the child node. The app will display the status of your child node position. Tap on the ‘Next’ button.
- Select a name for your new child node and tap on the ‘Next’ button again.
- You can also name the child node according to its location in the house. To do that, tap on the ‘Name it something else’ button.
- The child node is now successfully added to the Linksys Mesh Network. Tap on the ‘Next’ button to proceed.
If you wish to add more child nodes to the Mesh Network, you can follow the same steps as discussed above.