
A Complete Guide on the Linksys Velop AX4200 Setup!
The Linksys Velop is one of the most efficient whole mesh wifi systems, ideal to enhance the performance of your existing wifi router. However, you can experience these advanced networking features easily via the Linksys Velop AX4200 Setup. However, initial setup is the primary step to accessing and navigating to the Velop’s advanced settings. Therefore, if you want to learn this configuration process, then read this guide carefully. Here, we provide in-depth details regarding the Velop configuration in different ways. So, have a look below!

Methods to Configure the Linksys Velop AX4200 WiFi 6 Mesh System
Generally, there are two ways to accomplish the Linksys Velop AX4200 Setup, i.e.,
Setup via the web interface
Using the Linksys app
But, before proceeding with any of these procedures, you must have a stable internet connection, accurate login details, a Linksys app, etc. Further, you must know the detailed stepwise procedure to perform this configuration. If you want to know how to set up the Linksys Velop AX4200 system, dive into the following sections.
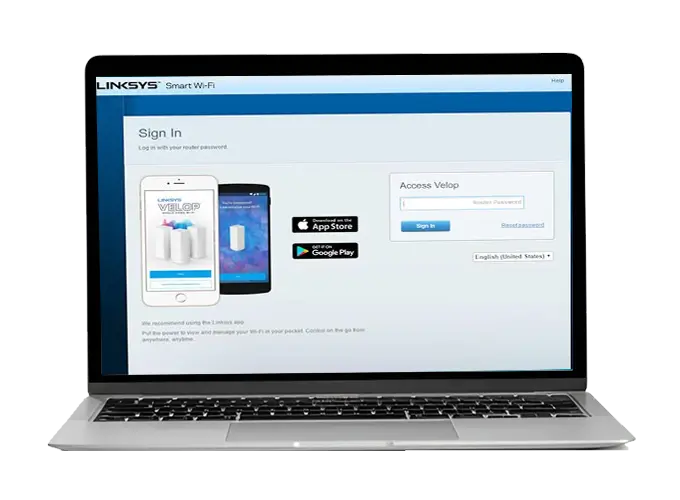
Linksys Velop AX4200 Setup Via Web Browser
- To begin with, make sure your networking device has a sufficient power supply.
- Now, connect the primary node to the home wifi network.
- After that, log into the Velop dashboard via the linksyssmartwifi.com web address.
- Further, you reach the dashboard of the Linksys Smart wifi.
- Hereon, go to the CA link at the bottom right corner of the screen.
- Now, navigate to the Smart WiFi Tools and select Connectivity under Router Settings.
- After that, tap the CA Router Setup tab.
- Now, customize your SSID and password to secure your network.
- Click on Setup Node and ‘Apply’ the settings.
- Then, you see the message ‘Your Master Node is now Configured’ on the screen.
- Next, visit the Internet Settings, Local Network, and Advanced Routing settings accordingly.
- You can add new nodes, configure Guest Network, Bride Mode, Parental Control, etc. settings.
- Follow the on-screen instructions to complete this configuration.
- Lastly, the Linksys Velop AX4200 WiFi 6 Mesh System setup ends here.
Setting Up the Linksys Velop AX4200 Via the Linksys App
- Firstly, download or update the latest version of the Linksys app on your mobile.
- Make sure to enable the Bluetooth settings on your mobile phone.
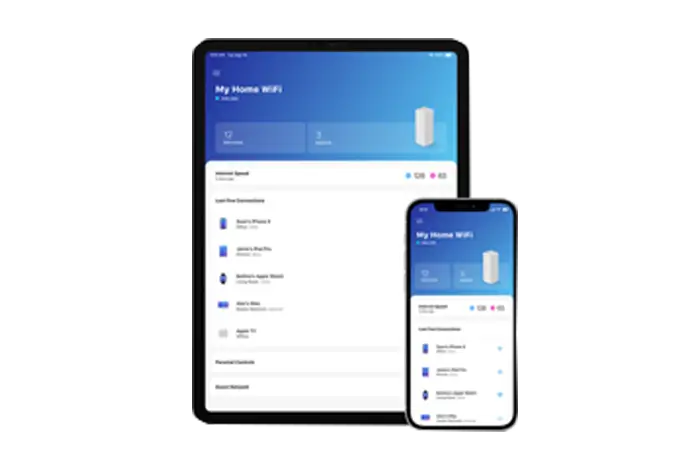
- Then, open the app and access the Velop dashboard using valid admin details.
- After logging in, you reach the dashboard of the Linksys app.
- Hereon, scroll down to the bottom and select Velop.
- Hereon, you can see the connected devices, allow guest access, parental controls, etc.
- Now, go to the Menu tap ‘Devices’, and select your device here.
- Tap only your device name and you can review your device settings.
- Further, go to the WiFi Settings from the Menu and customize the wifi name and password.
- Hereon, you can also configure the Advanced Settings to ensure wifi security.
- Similarly, go back to the menu and set up Guest Access, Parental Controls, and other settings.
- At last, the Linksys Velop AX4200 Setup is finished.
How to Change the Default Admin Password on the Linksys Velop AX4200?
Like any other networking device, the Linksys Velop AX4200 also uses the default login credentials to access its admin portal. However, it is always preferred to change these default login details because these are more susceptible to data breaches and threats. Therefore, to change the default password for the Linksys Velop AX4200, follow these steps:
- Primarily, log into the Linksys Velop dashboard via the Linksys app.
- Then, go to the device menu (three horizontal bars) on the left side.
- Now, scroll down and select the Velop Administration.
- Further, go to the ‘Change Admin Password and Hint’ page.
- On the Admin Password tab, customize your device password.
- Cross-check the newly entered password and tap ‘Save’.
- When someone changes this password, you get an email on your registered email address.
- Eventually, you can secure your Linksys Velop AX4200 mesh wifi system.
To sum up, this comprehensive guide explains the complete procedure of the Linksys Velop AX4200 Setup through easy steps. If you need any further assistance, reach out to us!
FAQs
What is the default username and password to access the Linksys Velop AX 4200 system?
The default username for the Linksys Velop AX4200 is ‘admin’ and the password is also ‘admin’.
Where can I find the model number of my Linksys Velop AX4200 WiFi 6 Mesh System?
You can find the model number of your Linksys Velop AX4200 on its sticker or label.
How can I add a new node to the velop during the Linksys Velop AX4200 Setup?
To add a new node to your Velop system, access the Velop dashboard via the Linksys app. Then, go to the Menu, scroll down, tap ‘Set up a new product’, and follow on-screen instructions.
What should I do if my Velop AX4200 mesh wifi system is not working?
If your Velop AX4200 system doesn’t work, then check your internet connectivity and power supply. Secure the cable connections, eliminate network interference, fix browser issues, power cycle your device, etc.