
Linksys MX4300 Setup Guide- The Only Manual You Need
Gone are the times when you needed a range extender to extend the internet around your space. Mesh WiFi systems have rapidly substituted these devices and allow users to access seamless internet at their home in a seamless manner. If you have also upgraded to these latest devices, learning how to configure them for use will come in handy. This blog will walk you through the Linksys MX4300 setup process, detailing steps for basic installation, login procedure, internet configuration, firmware update process, and basic troubleshooting.
But first, what is Mesh technology?
Mesh, as the name suggests, is a group of several router devices that communicate with each other to provide all-around signal coverage. Imagine having a common/host router and a second router connected to it, acting as a signal recipient and transmitter to expand network coverage.
The host router in this kind of setup is recognized as a ‘Parent Node,’ while the secondary routers are termed as ‘Child Nodes’ or ‘satellites’ at times. Similarly, when you set up your Linksys MX4300 Setup, you must assign one of the routers as a Parent router, and the others as its Child Nodes. However, to ensure that the setup works, you must ensure that you have an active internet connection at home. If not, get it activated before you start setting up your devices with the network.
Now, you might have come across people/information claiming MX4300 is a Mesh system, but it isn’t, surprisingly. Yes, this router does not support Linksys MX4300 Mesh Setup and operates as a standalone router. Services like Linksys Cloud and Linksys App support are also not supported. It means that you cannot configure Linksys MX4300 bridge mode settings.
Linksys MX4300 Manual Setup
As per the device specifications available on the official Linksys website, the Linksys MX4300 supports a Plug-n-Play setup. This means that once you plug in your device to the power line and the LAN cable from the modem, it will activate itself and complete the setup automatically.
However, if you have a PPPoE connection or there are factors that prevent online connectivity, you have to set up your Linksys MX4300 system manually. So, if you are going to do the same, the information below will help you.
Beginning with the Linksys MX4300 Setup
Before you begin with the setup process, make sure you have the following items readily available at your disposal:
- Linksys Velop Mesh System
- WiFi Name, password and recovery key
- Username and password(in case of a PPPoE connection)
Once you have all the prerequisites, here are the steps you can follow:
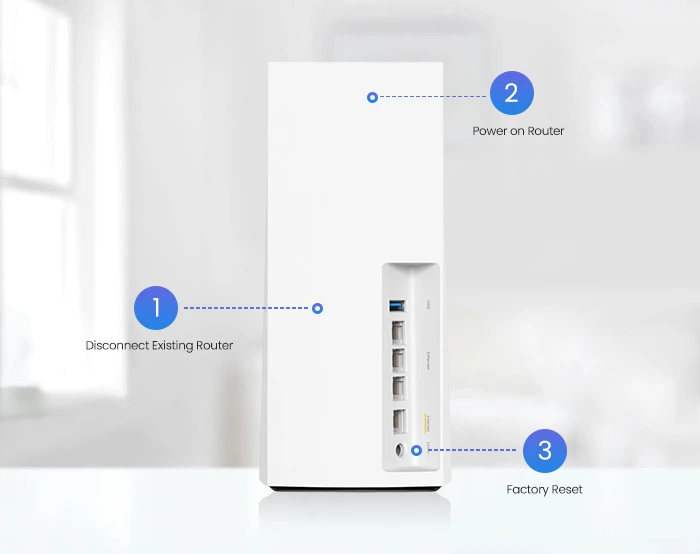
- Disconnect the existing router.
- Connect your MODEM to the router’s internet port using a LAN cable.
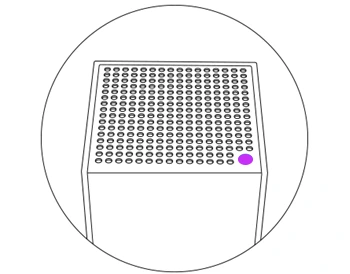
- Power on the router and allow some time for the indicator light to turn Solid Purple. This will signal that it is ready for the setup process.
- If the light doesn’t turn purple, press and hold the Linksys mx4300 factory reset button for about 15 seconds and then wait until the light turns so.
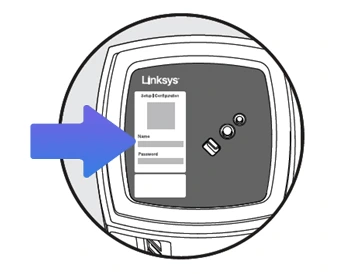
- Now, connect a computer to the default SSID of the router. The router network SSID and password will be written on the product label. You can either connect wirelessly, or use a wired connection.
- Once connected, use the default IP address 192.168.1.1 to access the login page for your Linksys MX4300 LN1301 router.
You will now reach the Linksys router login page. In case you receive an error message on the screen saying ‘Your connection is not private’, click on the Advanced tab on the same screen and then click on Proceed to 192.168.1.1 link at the bottom. This will redirect you to the Linksys MX4300 login page.
Linksys MX4300 router Setup - Network Settings
Once you are on the login page, enter the router password and then click on the Sign In button. The default password is the same as that of the default WiFi password. You will now reach the router setup dashboard.
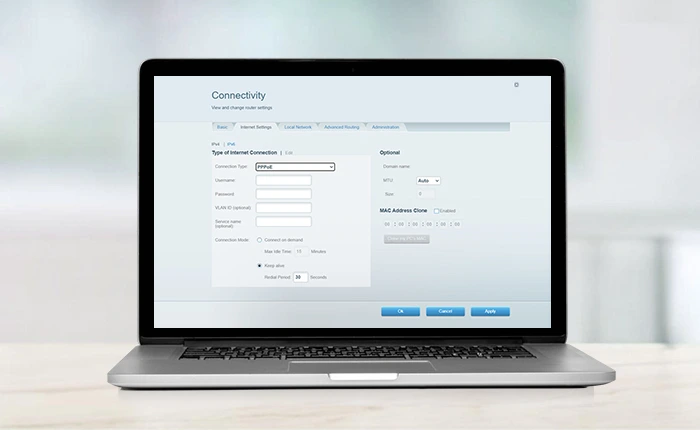
- On the MX4300 setup window, you’ll get Network Status as ‘No Internet Connection’.
- Click on ‘Connectivity’ and head to ‘Internet Settings’. Here, click on the ‘Edit’ button.
- Select the Network Connection Type from the options. You can select from among PPPoE, Static IP, and Automatic Configuration-DHCP to proceed, and type in the ISP settings accordingly.
- Once you have edited the fields, click on the ‘Apply’ button and then click on the ‘Ok’ button.
- Allow some time for the network status to show ‘Connected’ status and refresh the page if needed. Once the status of the page shows ‘Connected’, your network is ready to use.
- You can connect your devices to the network and start using the internet seamlessly. If you ever need to manage or customize your network settings, you can always log in to the dashboard and make the changes as needed.
Need additional information on Linksys MX4300 LN1301 Setup Process?
Get a Linksys mx4300 review from our experts today!
FAQs
What are the default settings for Linksys MX4300 LN1301?
The default settings details for the Linksys router include the IP address, the WiFi name, and the Guest WiFi Name. The details on these are below:
Default IP address: 192.168.1.1
Network Name/WiFi Name: Linksys XXXXX (the XXXXX represents the last 5 characters of the router’s serial number)
Guest WiFi Name: Linksys XXXXX-Guest (the XXXXX represents the last 5 characters of the router’s serial number)
Linksys MX4300 default password: find the details on the product label at the bottom of the router.
How do I update the Linksys MX4300 Router firmware?
The Linksys MX4300 router undergoes an automatic firmware update process. This feature is enabled by default and happens in the background automatically whenever a new version is released and is available for the device.
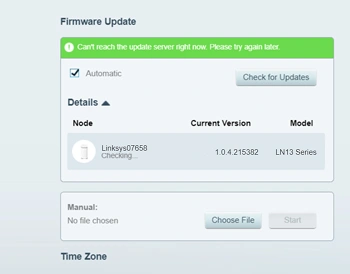
If you ever need to update the firmware manually, login to the router settings management wizard and follow the steps:
- Scroll to the bottom of the page and click on the CA link you see.
- Now, click on the Connectivity option and then select Choose File.
- Select the firmware file you have downloaded and then click on the Start button.
- The update process will start now. Ensure the router is not turned off or disconnected from the mains power outlet. Once prompted, click on the Ok button and confirm the selection by clicking on the Ok button again.
The firmware update process is complete now and you can start using the device as usual.
My router is online but the light is still showing solid purple. What should I do?
The plug-and-play setup will support if the router is connected directly to a MODEM for a DHCP internet connection. If you are going to connect the router to an existing network, the Plug and PLay feature may not get activated, even if the router is online. This will make the LED stay purple without changing to Solid blue. To resolve the issue, here are some steps you can follow:
- Login to the Linksys MX4300 router setup wizard and scroll to the bottom to click on the CA link.
- Here, click on the Connectivity option and then select the CA router setup option.
- Customise the new WiFi name and password and click on the Setup Node button to proceed.
- Wait till the light on the router turns solid blue. You can connect to the WiFi again if required. Once done, click on the Ok button and your network will be ready to connect to.